
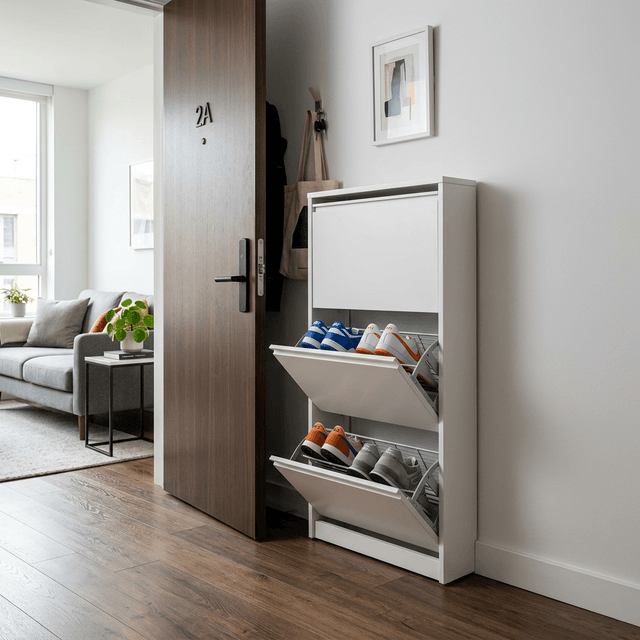
Most urban apartments don’t have a real entryway. Your front door opens straight into the living room, which means your shoes live on the floor by the door, creating a pile that triples in size every winter. No mudroom, no closet at the entrance, no room to build one. For more room, see the best shoe storage cabinets for narrow hallways.
The solution isn’t more storage — it’s changing where the shoes actually go before they hit the floor. Here are the methods that work in apartments under 50m², tested without drilling a single hole.
Table of Contents
- Why Shoe Piles Form (And How to Break the Habit)
- Method 1: Tilt-Out Shoe Cabinet
- Method 2: Over-the-Door Shoe Organizer
- Method 3: Bench With Built-In Storage
- Method 4: Wall-Mounted Shoe Shelves (No Drill)
- Method 5: Under-Furniture Rolling Bins
- Which Method for Which Apartment Type
- FAQ
Why Shoe Piles Form (And How to Break the Habit)
Shoe clutter has a single root cause: there’s nowhere to put shoes at the exact moment you take them off. If storage requires bending, opening a door, or walking to another room, you won’t use it consistently.
The fix is to place a shoe storage solution within arm’s reach of where shoes actually come off — which is almost always directly beside the front door. Distance from the door is the main variable. Even 1.5 metres away reduces compliance by about 80% in daily habits.
Method 1: Tilt-Out Shoe Cabinet
The tilt-out (or “tilt-bin”) shoe cabinet is the best option for blank wall space directly beside the door. Units like the IKEA HEMNES shoe cabinet or the Furinno Shoe Cabinet protrude only 22–28cm from the wall — about the depth of a thick paperback.
Each compartment holds one pair horizontally. The front panel tilts outward and down to insert or remove shoes, then closes flush. From the outside, it looks like a narrow sideboard.
Sizing reality check:
– Standard units hold 3–6 pairs per column
– A 3-column HEMNES holds 9–12 pairs
– Tall boots (above ankle) don’t fit in standard tilt-bins — they need the side compartments of wider units
No-drill installation: All major tilt-out cabinets are freestanding. Place them and they’re done. The HEMNES is 85cm wide × 30cm deep × 89cm tall — that’s roughly the footprint of one dining chair.
Cost: €80–€200 depending on size and material.
Method 2: Over-the-Door Shoe Organizer
If you have a closet near the entrance, the inside of its door is unused vertical real estate. An over-the-door organizer (hooks over the top of the door, no drilling) holds 12–24 pairs in fabric or clear vinyl pockets. The same use of unclaimed vertical space applies to over-the-toilet storage in a small bathroom, where the wall above a fixture is often the last free surface.
What to look for:
– Clear pockets — so you can see what’s inside without opening each slot
– Reinforced pocket openings — cheap organizers tear at the top of the pocket after 3–6 months
– Width matched to your door — measure the door’s clear width before buying
What it can’t hold: Boots, wellies, or anything taller than ~25cm. Over-door organizers work well for flat shoes, sandals, and trainers.
One practical note: The organizer adds 8–10cm to the back of the door. Make sure the door can still open fully without hitting the wall or a shoe rack on the other side.
Cost: €15–€35.
Method 3: Bench With Built-In Storage
A storage bench at the entrance solves two problems at once: somewhere to sit while putting on shoes, and storage underneath. Benches like the IKEA TJUSIG or Vasagle Storage Bench combine a seat with open cubbies or drawers below.
Dimensions that work: For a studio, a bench 80–100cm wide × 35–40cm deep is the sweet spot. Anything wider starts to block the entrance.
Cubby vs. drawer:
– Open cubbies: faster access, shoes visible, easier to use daily
– Drawers: cleaner appearance, hides clutter, but you need to remember what’s where
Capacity: A typical 3-cubby bench holds 6–9 pairs on the bottom shelf plus whatever you stack on top or beside it.
Cost: €60–€150.
Method 4: Wall-Mounted Shoe Shelves (No Drill)
If you want the look of floating shelves without drilling, adhesive-mounted floating shelf brackets rated for 15–20kg each can hold 2–3 pairs per shelf. Brands like Command and Comax make strip-based shelf brackets that peel off cleanly.
Honest limitation: These work reliably on smooth painted plasterboard. On textured walls, brick, or older paint that’s already peeling, they fail — sometimes spectacularly. Test one bracket for 72 hours before loading it.
Maximum load per strip set: Most Command large strips handle 5–7kg. For shoes (average 0.8kg/pair), that’s 6–8 pairs per bracket pair. Use two bracket pairs per shelf for safety.
Cost: €20–€40 for brackets and strips, then whatever the shelf board costs (€5–€25 for a plain timber board from a hardware shop).
Method 5: Under-Furniture Rolling Bins
If you have a storage bench, a sofa near the door, or any piece of furniture with clearance underneath, shallow rolling bins slide in and out to hold flat shoes out of sight.
IKEA SKUBB boxes (22cm tall) on furniture casters work well. StorageLAB and Whitmor also make specific under-bed/under-furniture shoe boxes. The same boxes fit under a bed frame, and the wider range of under-bed storage for small apartments covers which heights clear a standard frame.
What fits: Flat shoes, sandals, gym shoes. Not boots, not anything with a heel taller than 8cm.
Maintenance problem: Out of sight means out of mind. Rolling bins tend to become dumping grounds. Work best if you use them for off-season shoes and rotate twice yearly.
Cost: €15–€40 for boxes, €5–€15 for casters if adding them yourself.
Which Method for Which Apartment Type
| Situation | Best Method | Cost |
|---|---|---|
| Blank wall beside the door | Tilt-out cabinet | €80–€200 |
| Closet near the entrance | Over-door organizer | €15–€35 |
| Space for a seat | Storage bench | €60–€150 |
| Smooth walls, want floating look | Adhesive shelf brackets | €25–€60 |
| Under existing furniture | Rolling bins | €20–€55 |
| Large collection (15+ pairs) | Cabinet + shelf on top | €150–€280 |
Safety Disclaimer
Adhesive wall strips have maximum load ratings — do not exceed them. For heavy items, always use two strip pairs per bracket. Test adhesion on your specific wall surface before loading any weight. Freestanding cabinets placed on smooth flooring can slide — use a non-slip mat underneath or furniture grippers.
FAQ
How many pairs can a standard tilt-out cabinet hold?
A 3-section HEMNES-style cabinet holds 9–12 pairs of flat shoes. Add an open shelf on top and you can store 3–4 more pairs of boots standing upright.
Can I use an over-door organizer on a front door (not just a closet door)?
Yes, but check whether your front door opens inward or outward. If it opens inward, the organizer will face the room when the door is open. If it opens outward, you lose the hook clearance. Measure the door gap before buying.
What do I do with tall boots?
Tall boots need vertical storage. A boot organizer (a simple plastic separator that keeps boots standing) fits inside a standard cabinet with the doors left open, or in a narrow space between the cabinet and the wall.
My floor is uneven — will a freestanding cabinet wobble?
Use adjustable furniture feet (sold separately, €5–€10 for a pack of 4). Most IKEA cabinets have standard threading for adjustable legs.
How do I keep the shoe cabinet from smelling?
Place a small sachet of activated charcoal or cedar chips inside each tilt compartment. Replace every 3–4 months. This is more effective than sprays, which just mask odour rather than absorb it.
